Category Archives: Patchwork and quilts

Posts about patchwork, quilting and other sewing projects

2017 – a year of moving forward and not looking back

This year – 2017 – so much has happened, personally, professionally. So many changes, so many challenges, so many new things that I have tried.

I have travelled to India, Canada, France, USA, Netherlands, Denmark, Spain, Malta, I have lived all around the UK – in flats, in houses, in cities, towns and the countryside. Moving on, moving on, all the time.

My friends have been my safety net, my front row, my supporters, bringing me encouragement, reminding me of what I want to be and what I am. I think of my long standing friends, and also friendships renewed across the years, and new friends, people I have met for the first time in 2017, yet feel I have known forever. Some encounters built on years of friendship, some encounters were only of minutes in length. Souls touching and parting, linked now only by the tenuous threads of memory.

I have stretched, grown, released tired and knotted muscles, been still and moved swiftly, listened and spoken, laughed and wept, started to spin the threads that I will weave to fabric and sew into a new patchwork quilt of a new life. And now, at the end of the year – I am. I am an expert, I am a student. I am a thinker, I am a comedian. I am a sewer, I am a painter. I am a writer, I am a musician. I am a dancer, I am a swimmer. I am a listener, I am a speaker. All these things I have done, some not so well, but all of these things I have done.

2017 has been an extraordinary year – my life has changed. I acknowledge that I have much to be grateful for in my life: my energy, my friends, everything that has happened. I acknowledge the suffering and pain so many in the world feel, and hope for its cessation.

“Looking forward and not back” says one of my friends, and that is the watchwords – after this brief review, this acknowledgement that 2017 has been a year of personal growth, of creativity, of energy, of growing to know myself better.

What will 2018 bring? What do I want and what can I achieve?

Look back, see the past

landscape clear. Looking forward:

new path starting now.

Quilt: a wine tasting in Italy

In May I went to a workshop in Italy, run by Tania Katan and Angela Ellsworth. It was a mix of meditation, writing and visual arts, centred around themes of topography, memory, and sensory perception: the Topography of Memory, at Spannocchia

As part of the week, we had a wine tasting for the wines produced on the Spannocchia Estate – the grapes are grown, harvested, made into wine, bottled – all on the Estate.

There were eight of us, a magical week of shared experiences and creative impulse, that I will not describe here. This post is about the quilt that I made, starting at the wine tasting.

We tasted red, rose, white – which was palest yellow – the golden fortified and clear grappa. Five colours, five textures – each liquid having its own unique viscosity and each glass type a smooth but differentiated touch against the lips. There were five sets of perfumes, not a single aroma from each wine, but a whole range which we tried to identify from the wine tasting wheels with their strange and vivid descriptions – fungal bubble-gum fruit… And the sounds – of wine trickling into glasses, of laughter and delight as we tasted, of the rims of the glasses sounding, sounding echoing, fuzzing across the room, against the touch of our fingers. We made music.

As we completed the tasting, I noticed that the glasses scattered across the table, each with a trace of wine left were sometimes quite random, but starting to form patterns. I started to form the glasses into a quilt – red, pink, white, amber, clear, pink, white, amber, clear, red…

I became… slightly obsessed… with the idea of a quilt. When I returned to the UK, I started to draw and paint the experience.

4 sketches: trad-style concept for the quilt, wine glasses vibrating from above, glasses set out in pattern, with calculations, and 8 women vibrating wine glasses


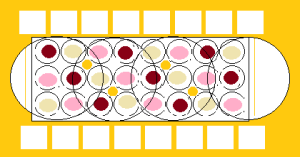
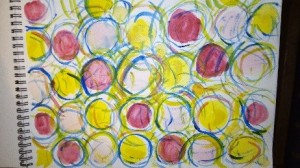
Concept sketch – yin-yang of the group and the wine.


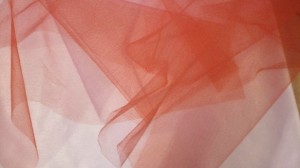
Next, I went and looked at fabric. I needed something that would proxy the translucent nature of the wine and glass, and the echoes and vibrations of glass music, and the interactions between us.

I found net. I have not worked with net before, so I bought some lengths in red, pink, pale yellow, white to work with. I found that layering the net produced iridescences and merged colours that were very interesting.

2 photos of net overlays

My ideas for the quilt started to change because of the nature of the net itself. I envisioned overlapping the pieces more, and more randomly, than I had at first thought. The quilt needed to be a little wild, a little uncontrolled. It needed to reflect that there are 8 of us, one group, 8 individuals, and within that duos, triples, quartets, sextets, in all the permutations. It needed to be public and private – shared and hidden. It needed to be delicate, graceful, vulnerable to harm, easy to damage, easy to repair. Loosely assembled, yet strong together or apart.

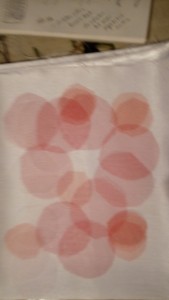
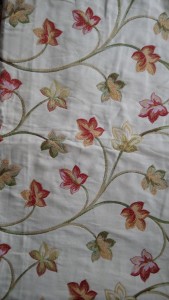
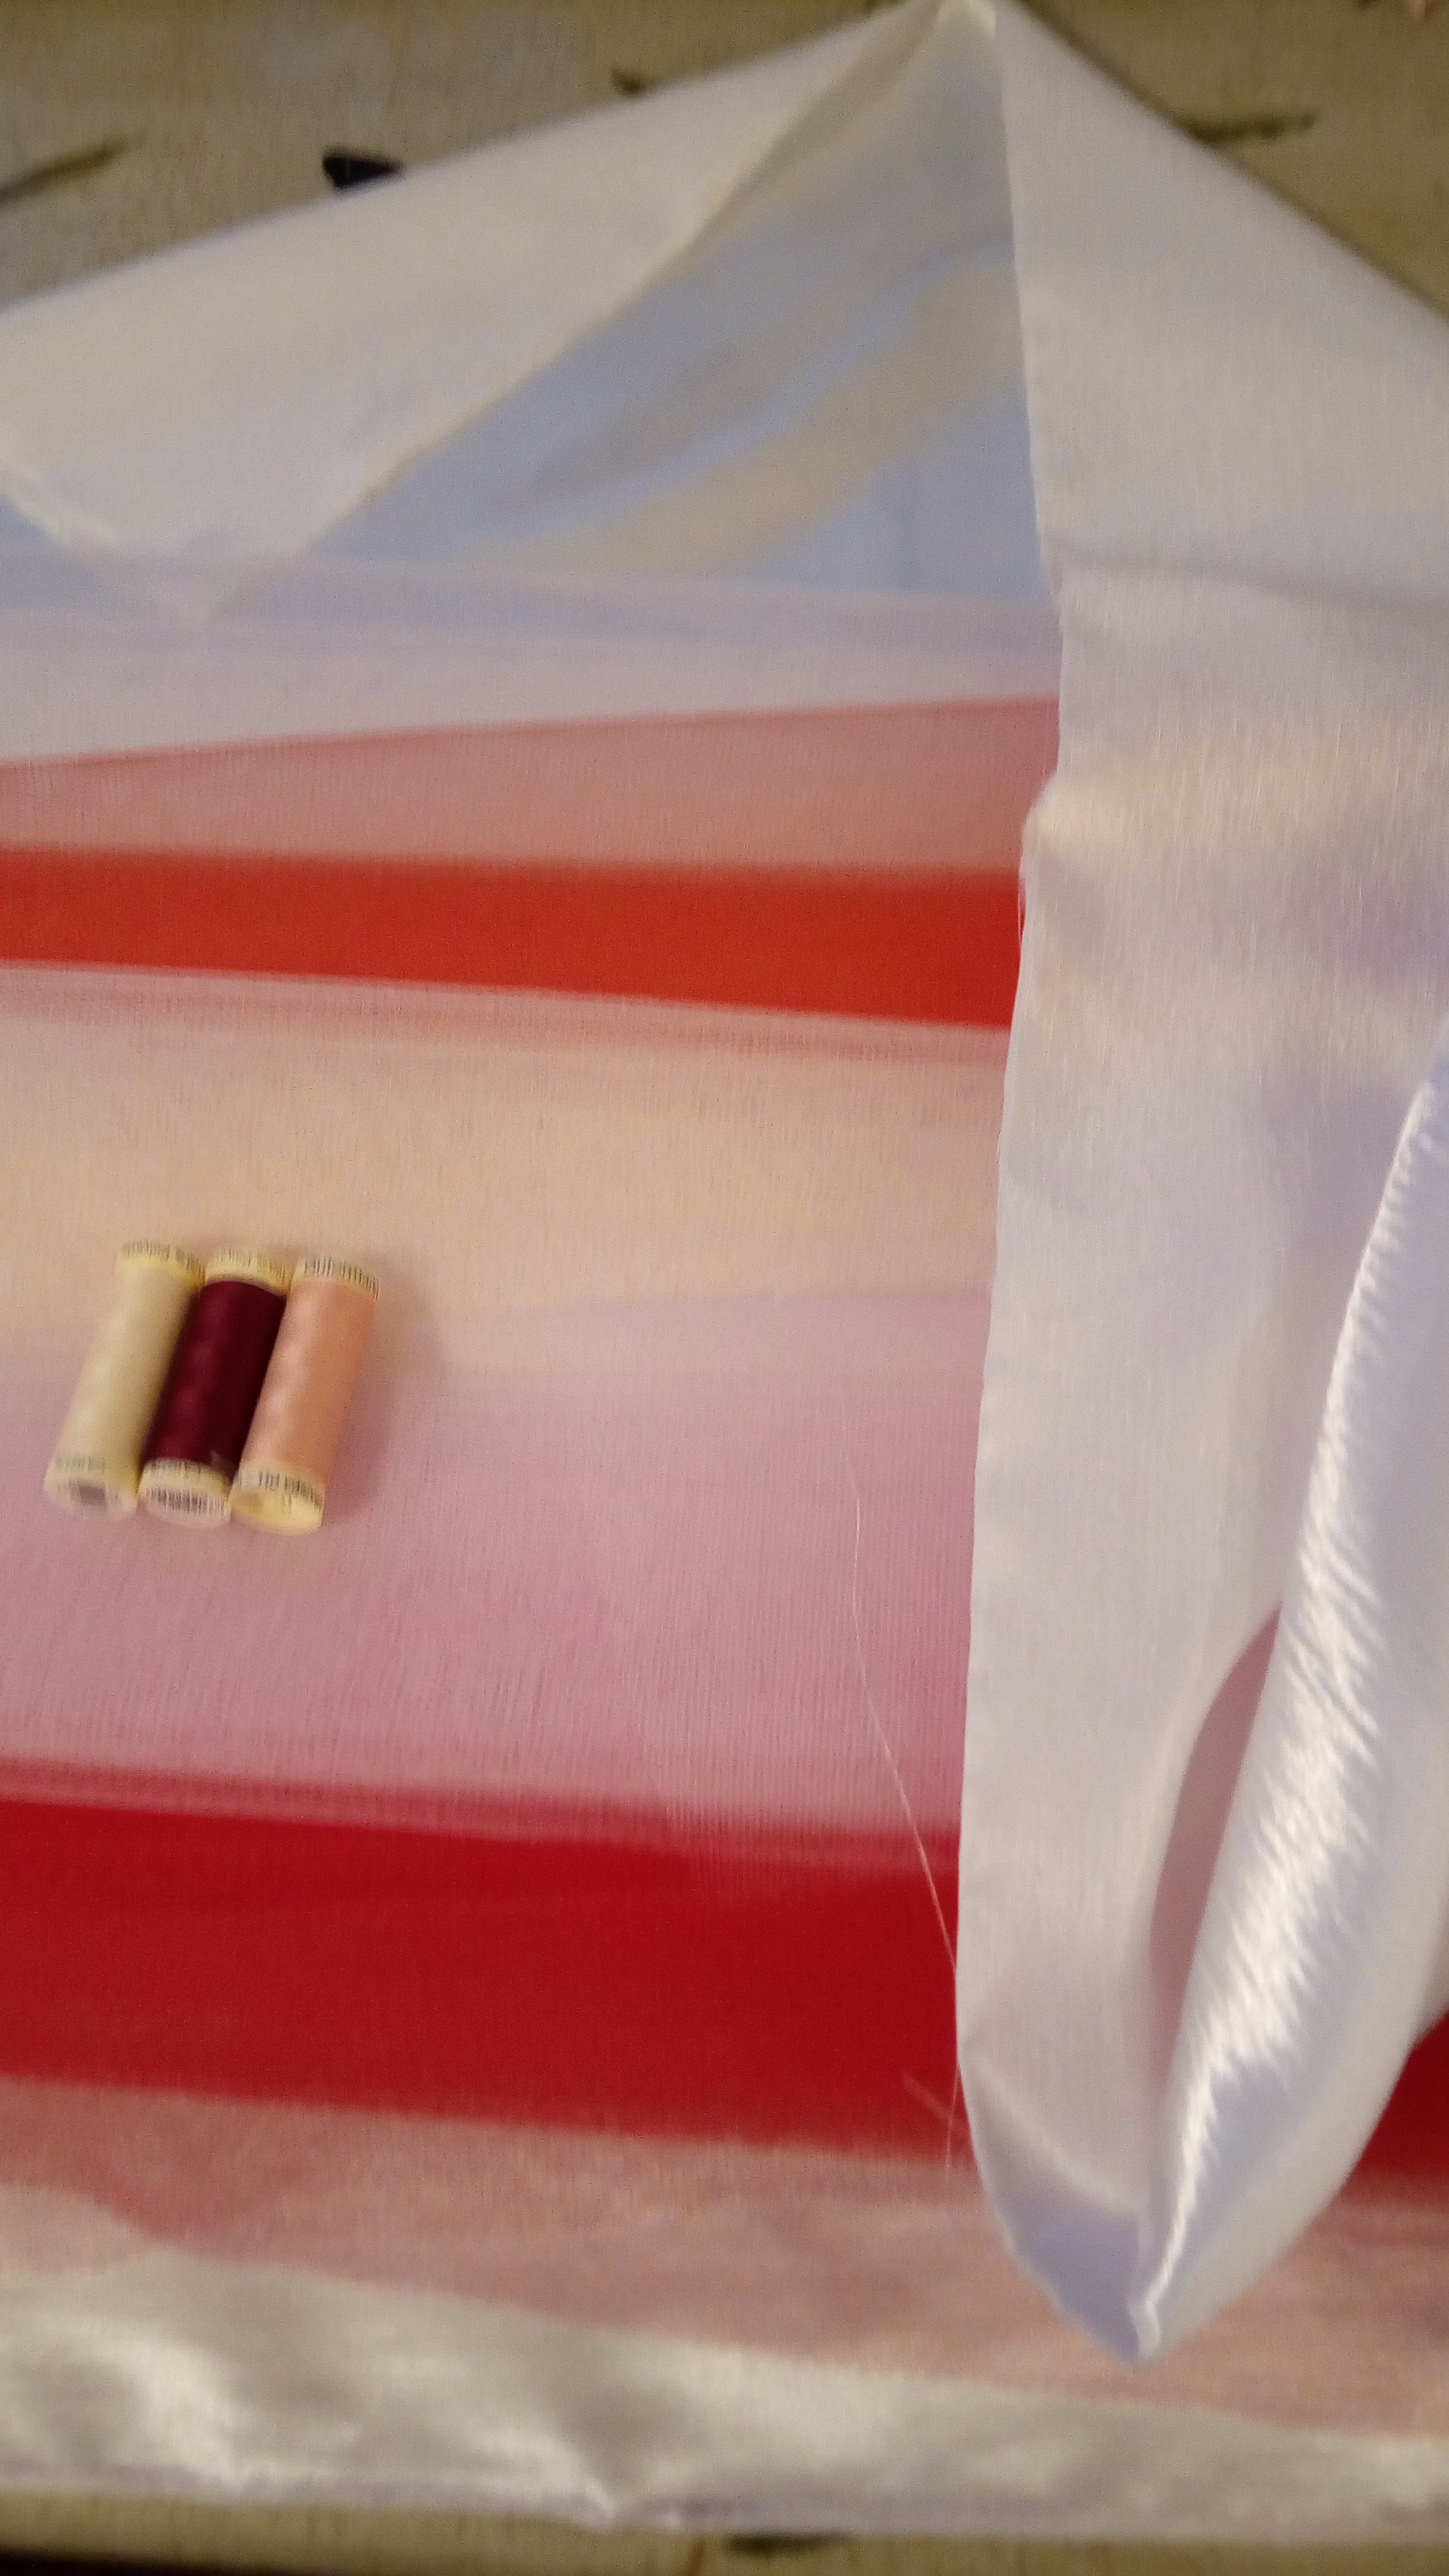
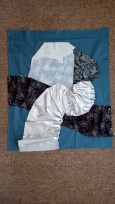
I had net – red, amber, pink, yellow – but nothing for the grappa, nothing for a background. Then, I found more fabric at another store on the remnants table. A clear pale mauve chiffon for the grappa. A white, double sided silky or mat fabric for the background. An Italian style tapestry possibly for the background. I started… experimentally. I cut out circles of the net and started to overlay them.

3 photos of Swatches, cottons, circles and tapestry

Then I realised what I needed: for each person, a white square. For each white square, 8 red, 8 pink, 8 yellow, 8 mauve and 8 orange circles – for the drinks. And 1 white net circle for the tasting wheel. I realised I wanted to quilt the squares as separate pieces and join them together – but maybe not permanently. I realised the tapestry fabric was too heavy – I needed a neutral gauzy fabric for the background. I found a grey scarf in the charity shop, just right for the background. I found some grey satin in my fabric bag for the back of the squares. I got some quilt wadding. I also had 8 colours of sewing thread. I started cutting and arranging. I cut all the circles and the white square, and I arranged and sewed the circles to the squares. Half the squares are shiny-side-up and half are mat-side-up. Each arrangement is semi-random, and unique.

4 Photos: starting to set out a set, starting to quilt one of the backs of the squares, a set laid out for pinning and sewing, and ribbon and bead colours

Then, I cut the eight grey satin squares, and eight pieces of wadding, and quilted the satin to the wadding by hand. On each square, I used the 8 different colour threads, but I focused a different colour on each. Each design is different, each has some reference to the week. All are curved, hand-stitched quilting.

Then, I had to decide how to join it all together. And I realised, it needed to by joined in a way that it could be joined, taken apart, re-joined in a different order. That the net side or the quilt side could be front or back (tho’ I think of the quilts as more hidden). So, the answer was – ribbons and beads.  I got some ribbons of 4 different colours. I had some large beads. And, at the Birmingham Festival of Quilts there was a stand selling Italian buttons and beads. I could buy a set of cloth beads in colours to fit with the quilt.

Now, I was ready to join the back of the squares to the front of the squares. I used a different colour thread for each set, and blanket stitch. I inserted ribbon at each corner, alternate loop and tags.

I sewed by hand again – I knew machine sewing was wrong for this project – too violent, too mechanical, too certain.

As I finished each square I set it on the grey scarf, uncertain where this was going next.

Photo: Starting to lay out the pieces

Once I had finished the squares, I tied the ribbons together, so the eight were joined. Then I had to work out how to attach them to the background. I played around with the ribbons and beads, and eventually set is out with 4 large silk beads each with 2 colours of ribbons down the centre of the grey scarf. This stands for the 4 groups of 2 – we shared rooms in pairs. The eight quilted squares join in pairs to these four., Then more smaller beads are sewn on around the scarf, so the quilt squares also tie to them. They can be untied and moved around, whenever.

NB: the tapestry will get used for cushions or curtains.

The finished wall hanging of quilted and tied pieces: the pieces are designed to be tied and untied, so on can keep rearranging, decide which side to display, and so on.

2 photos: arrangements of the tied quilt

A wonderful, magical week, a wonderful magical afternoon, a beautiful group to be with. The quilt can never be finished, because you take it apart, and make it again. (I originally typed “take it about” and that is true too – it is light and portable, and I will take it to visit my companions from the workshop this autumn).

Quilt: a journey through Europe by train

In autumn 2016, I travelled by train from Budapest to Stockholm, via Hamburg and the ferry. This is an exciting journey, passing through so many places of historical interest, and such varied landscape. But, it is also exciting because the train from Hamburg to Copenhagen goes on the ferry – they drive the train onto the ferry, with you on board, and then off the ferry on the other side of the water. I love long train journeys. I love to go from one end of the line to another.

This quilt celebrates that journey: the colours of birch woods and autumn leaves, dense woodland, rocks, cities and water streaking past the windows of the train.

The first part of the route is a train from Budapest to Hamburg.  This train was a delight. Old fashioned compartments and a dining car. I had the company of a group of Hungarian lads on their way to Prague for the weekend. They leapt on the train at the last minute before it left Budapest, opened up their packed food and ate continuously all the way to Prague. They did not stop eating! The capacity of youth for food!

At Hamburg, I left the train and met my brother who joined me for the second part of the journey – especially to experience the train on the ferry between Puttgarten & Rødby.  He is keen on trains so had a great time photographing all the different trains, on all the platforms, on all the stations…  and we talked, and talked, and talked… The capacity of middle-age for conversation!

We spent the night in a hotel, and got the train to Copenhagen next morning.  Through countryside, and then we drew into the station Puttgarden to await the ferry to Rødby. My brother took photos of the train, the train driver, the view through the train driver’s window, us on the platform, on the train, by the train, of the ferry as it came in…  The excitement of being on a train pulling onto the lorry deck of a ferry cannot be overestimated – it was brilliant! Once the train was parked in the lorry deck of the ferry – on its own rails – everyone got off the train and onto the deck to enjoy the sea crossing.

It was a beautiful day, the sun sparkling on the water and the gulls wheeling above. The colours of the world had changed from orange, russet and gold to blue, silver and grey. As the ferry drew into dock, all the train passengers had to rush down to the lorry deck and get back on the train before docking, as it sets off as soon as the front of the ferry opens.

In Copenhagen we changed trains, and again crossed water, this time via the ØRESUND BRIDGE and then north through gathering darkness to Stockholm.

I took numerous pictures, but the ones that most evoke the journey for me and which are the source shots for the quilt are the slightly blurred landscapes. Here are some of the inspiration pictures for the quilt.

I made a preliminary sketch based on these impressions and memories.

sketch

The key inspiration was the way that – from the point of view of the passenger – the landscape rushes past the window, becoming smaller as it moves away. The colours of autumn and water streak past horizontally, while the trees and their reflections make strong vertical lines – especially the birch trees, strong yet delicate.

I gathered fabrics in colours that matched the autumn and water, and started to play, plaiting, rouching and manipulating the fabric, experimenting, sewing and unpicking. Gathering, and gathering.

Eventually a theme started to emerge, but I was sketching with fabric – I did not know where it was going to end. The photos below show some stages I went through.

I’ve used the material itself and folds to indicate waves on the sea, and folds in the landscape – from the furrows in ploughed fields to the roll of hills and sides of mountains.

As I manipulated the fabric, the ideas for how to express the quilt’s theme changed. The essentials of horizontal lines moving to a point to give left to right movement, punctuated by the horizontals to represent birch trees remained, but the colour, texture and draping qualities of the various fabrics affected how I could use them.

Eventually I stopped pinning and tacking, and went to the sewing machine – I had to commit to this or it would never happen.

I spent a couple of days sewing with the machine, pulling the fabric around, adding details, joining fabric pieces, overlapping, pleating, rouching and running quilting stitches over the surface – pale vertical stitching to indicate trees, and blue horizontal stitches for water and wind.

And is this the finished quilt?

finished

It is as far as I can bring it at present. As ever I am dis-satisfied, but it has some aspects that I am pleased with. It does feel vertiginous, it make you feel a little dizzy to look at, so there is some sensation of speed. The folds of the cloth do indicate the folds of the landscape and waves on the sea. Probably, I would like it to be longer horizontally and smaller vertically. But there are some ideas I can reuse.

An autumn train journey across Europe from Budapest to Stockholm

via Bratislava, Prague, Berlin, Hamburg, Lübeck, Puttgarden, Rødby, Copenhagen, Malmö, and Linköping.

Woods and fields, trees and rocks, sea and ships, towns and cities.

Thank you to the HUSTEF, UCAAT and EuroSTAR conferences in 2016, whose choices – of date, city, and myself as one of the speakers – meant that I had to make the journey between Budapest and Stockholm, and could choose to make it by train and not plane!

When planning this trip, I consulted “The Man in Seat 61” and I recommend him if you want to plan or dream a train trip anywhere in the world!

Picture Quilt: a visit to the Bass Rock

Bass Rock from North Berwick Beach

Bass Rock from the shore

Earlier this year, I went with my pal John to visit the Bass Rock and look at the Gannet Colony. We went out by boat, on the Sula. As you approach the Rock, it looks white, then like velvet, ad then you see a cloud around it, like the electrons around the nucleus of an atom – if there is an atom with ten’s of thousands of electrons in its cloud. As you get closer, these resolve into thousands of gannets nesting on the rock and thousands more flying around it. John had recommended that I wore a hat. I’m glad I did.

On the boat, it looks smoother than it was

On the boat to Bass Rock

On the boat approaching the Bass RockHere is the view from the boat. I was finding it hard to stay upright. The sea was roughish, for a landlubber like me, and there was lots to catch the attention; puffins, seals, kittiwakes, gulls, gannets, the ever-changing sky and sea.

bass-rock-sketch-cropped

First sketch of the Bass Rock boat trip

The visit resulted in a design for and the execution of a picture quilt. I managed to work this on really quickly. I made a quick sketch of my impression of the rock and the boat trip:

I bought some materials in a fabric shop in Stirling, and sat on John’s dining room floor playing with the pieces. I had found materials in blacks, greys and blues, and in a range of textures and patterns that reflected the sea and sky colours, the white and black of the gannets, the specks of bright colour from swimming puffins, and the swirl and shift of the sea.  And then I played, pinned, stitched and altered. John showed me a website with a print of the Rock done in the 17th century; I was pleased to see the bird cloud.

first attempt at placing fabric to look like the rock and waves

Initial placement of fabric

Here is the first placement of fabric pieces: I had ruched some of the grey satin to give the idea of waves and billows, and also the black and gold material – a printed cotton in a pattern called flying cranes reminded me of the gannets, puffins and kittiwakes on and above the water around the boat. I used two shades of patterned grey to make the sides of the rock where the gannets nest. And the darker grey and black made the cliff on one side where the kittiwakes next. The top and side of the rock are white with birds and guano. Once I had placed those pieces, I started tacking them in place, and thinking about the eventual quilting. I used a piece of the black and gold to make the reverse of the quilt, and then a mix of hand and machine quilting to hold it together, indicating waves and bird flight paths.

work in progress - machine stitching part done

Bass Rock Quilt part way through machine quilting

Here is the quilt part way through machining it; you can see I have folded the backing to the front to make a border.


bass-rock-painting-crop

Watercolour pencil sketch of the Bass Rock

At this stage I also did another sketch, this time with watercolour pencils, to remind me of my initial vision.


Finally, I stitched in the cloud of birds using pale grey running stitch in curves.

completed quilt, all hand stitching done to show the bird cloud

Bass Rock Quilt – completed


Here is the completed quilt, with hand stitching done, you can see the bird cloud around the rock, and the stormy, grey billows of the sea and foam.

It really is soft ware, it’s very like IT…

I built a patchwork quilt. When I look back on that 10 years of work, it has been rather like an IT project. What I have built is literally soft, and very cosy. It is soft ware. The process of making it has taken me through decisions around unclear and changing requirements, design and prototyping, and a final delivery with some compromises and some surprises.

Even though I was the customer and the maker for the quilt, I still managed to have unclear requirements. At each stage I did not know what I wanted until I saw it, my requirements and expectations have changed. In fact when I started collecting fabric, I did not know that I wanted a quilt. And, I certainly didn’t expect I would up with something so large.

It’s a software project that got out of control, but still, it delivered, and the ending is beautiful and used every day. Uncertainty was part of the story – uncertainty drove the creativity. The User eXperience (UX) for the quilt is excellent – the journey to get to that UX was at times terrifying. At each mistake and uncertainty I had to think “do I unpick or stop or do I go on?” How much more difficult UX is when you are not your own customer. Be aware that uncertainty is natural.

The pre-history of the quilt

Over the years I have travelled to many places for work and for pleasure. I started to buy fabric and patchwork squares in different places, and to make small patchwork projects.

The first project was done with my friend Susan, when I visited her in California. She is very good at patchwork and quilting so it was natural for her to take me to her local fabric shop, where I was overwhelmed with the deliciousness of the fabrics on offer – the colours, the designs, the possibilities…. we got fabrics with patterns of things like chillies, sweetcorn, wine, cartoons, woodwork tools… and Susan helped me make a patchwork curtain for my artist husband’s studio door.

On a technical note,  using a small number of very big fabric squares to make the curtains made learning easier. Susan encouraged me to concentrate on a small number of new skills, for example using an overlocker machine (serger) for the first time, and to keep the project simple.

back home, the next project was to make some more curtains in patchwork, this time for the Kitchen cupboard instead of having doors.  I got myself an overlocker machine for making patchwork, to use alongside the sewing machine. They are both good little machines, but I get myself in a tangle when using them; slow and steady work is best or I end up in a flurry of broken threads and confusion. The interlocker is particularly difficult to rethread and some sessions with it I seemed to spend more time puzzling over how to set it up than actually using it.

For the kitchen curtains, I decided to make the pattern more complex, still square pieces but smaller, using symmetry to build the patterns in the piece placement. Also it seemed important to make the symmetry imperfect so that the curtains were similar but not identical. I needed 3 curtains.

The method is to decide on the placement of the materials, looking at colour and pattern, then cut the squares all to the same size using a straight edge, set square and cutter blade. Then place the materials again to recheck the pattern. Press the pieces and sew into strips, then press again. The strips are joined together, press again. And voila! Curtains.

If only it was that easy in reality… Well, it is easy, I just made it difficult for myself. I made several mistakes such as sewing the piece in the wrong order, putting the pieces together and realising I had seams showing on both sides, not managing to do a straight line on the sewing machine and interlocker… These mistakes were caused by a mix of absent minded carelessness, not rechecking at every stage, inexperience, gung-ho overconfidence and misunderstanding instructions / guidance gleaned from the internet and books. All the mistakes required me to unpick the seams and start again. Each time the lessons were the same: slow down, check every step, don’t try and skip things. Eventually I got the curtains made and hung. They have lasted well and survived the washing machine too.

Those early projects gave me confidence to start on the big quilt.

0003

Simple “four pieces a side” patchwork cushion cover


Quilt: an adventure in space across time

I was on the road. I was making numerous journeys for work, conferences and holidays. DSCF2476

In 2004, I collected some materials when we visited New Zealand, where along with the many delights of landscape, botany and birdlife, I found irresistible fabric shops. The collection of New Zealand fabrics grew as we travelled around the Islands.

Then, I kept buying fabric…

With visits across Europe, the US, Australia, New Zealand, Thailand, Singapore, Norfolk Island and Hong Kong, I gathered a large pile of fabric between 2004 and 2014. Every piece of material carries a memory of where I bought it, who I was with, what I was doing, what I saw and experienced in that country.

I kept – I still keep – all my fabric in an old wooden luggage trunk.  Every few weeks I would get the bags of material out of the trunk, take all the pieces out of their bags and arrange them on the bed, because that is the largest uncluttered surface in the house.

These fabrics are memory-holders. I would lay them out chronologically so I could see the order of travel across time (this is the first trip to NZ, the second trip to NZ…). Or I would arrange them geographically, grouping fabrics by where they had been bought so that fabrics from multiple visits to a single place were together (these are from BangkokDSCF2470). Sometimes I would pick out fabrics by the person I was with when I bought them (here is material I bought when I was with Lisa and Nancy.). Most of the fabrics show patterns with plants, birds or animals, so frequently I would arrange them by biological groupings (these are birds of New Zealand). Then I would press them, to keep them crease free, check them for damage, and pack them away again.

0004As the collection grew, the question grew in volume in my head “What to do with the material?” I was in state of obsessive collecting, but unable to decide what to make as the range of fabric types, colours, weights and patterns grew. Some of the fabric was clearly unsuitable for patchwork but had to be bought anyway as it too lovely to leave in the shop. That is the trouble with obsessive collecting; it knows no bounds.

In the end, I had to set myself a very small limit of how much fabric to get on each trip.

0003
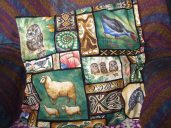
I made jackets, skirts, kimonos, curtains, cushion covers and pillow cases….
But eventually I realised that I need to make something large so I could celebrate as many journeys as possible. It had to be a bed quilt. And suddenly I realised – I needed to arrange the fabric by colour and pattern. I started to cut and piece the sections, thinking about symmetry, reflection and rotation. As I moved the pieces around a story started to emerge.

The central section needed to use the large piece of Japanese fabric with carp leaping up a rocky stream. I had bought this when visiting a quilt and patchwork exhibition with my mother so it held happy memories.

DSCF2477I surrounded this with some other Japanese fabric that I found while in Australia on a work trip with Stuart and on a work trip to Colorado, where I visited a fabric shop with Lisa and Nancy.

At the pillow end, I wanted to show the forests and birds that lived near the stream with the fish. I used materials from New Zealand showing ferns, tui, bellbirds and dragon flies to evoke the moist richness of a forest.

Then, I imagined that the stream ran down to the sea, so at the foot end, I used fabrics from Norfolk Island, New Zealand and Australia that show the colours of the sea, sand and shells, or picture coastal wildlife.0007

I then made four narrower strips with fabric showing fish, birds, ferns from many countries and fabrics based on New Zealand Maori motifs. I joined the strips in pairs end to end, to give rotational symmetry, and then placed on either side of the central strip to provide reflective symmetry across the patchwork.

DSCF2473
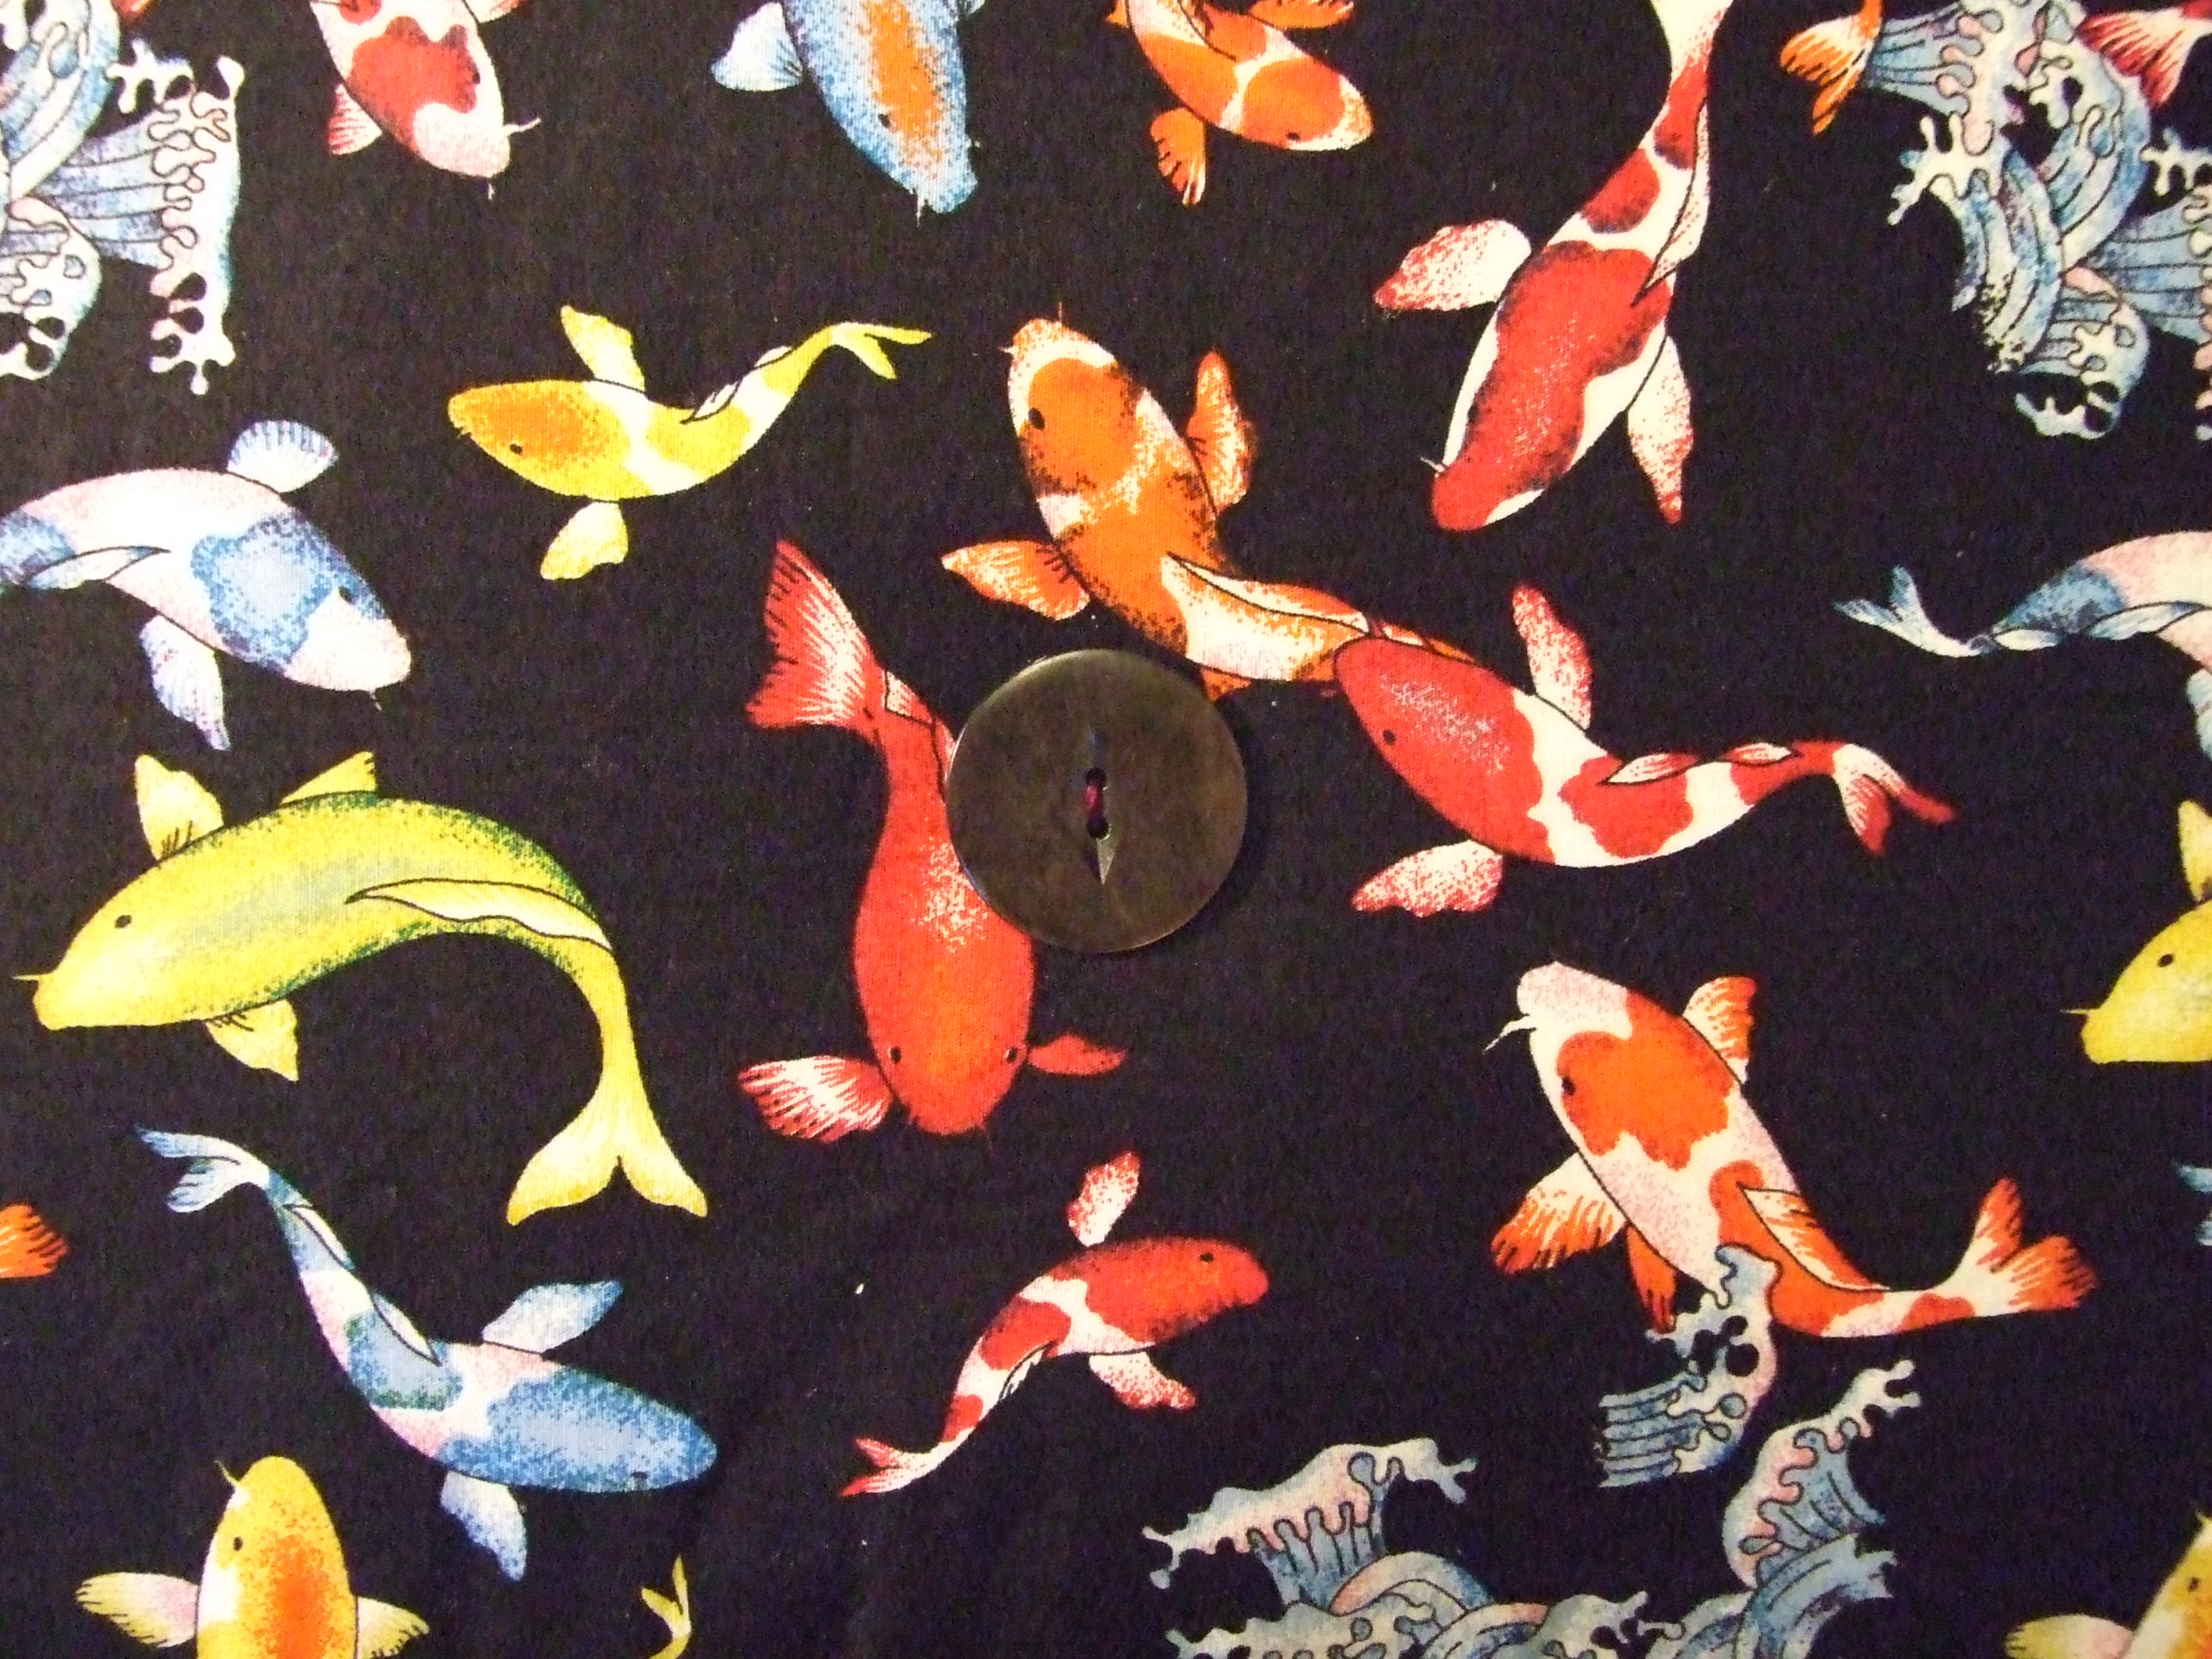
I realised that the patchwork section I now had would be too big to machine quilt, so instead I would need use a mix of embroidery and tie-quilting. I decided to use buttons as a decorative item and to hold the tie quilting. I have a large button box with many old buttons.

DSCF2474In addition I got some old family buttons from my mother and my mother-in-law. This meant I could add family memories of parents, grandparents and great grandparents using buttons from raincoats, summer dresses and baby cardigans from my mother in law’s and my mother’s button boxes.  I used embroidery silk for some handquilting, to attach the buttons and made the quilting knots, and on some of the sections I brought the thread ends to the front of the quilt to dangle like lichen in the forest or seaweed on the seashore.DSCF2479

The work was getting larger, I was still travelling and collecting more material, which I wanted to incorporate. Also, as I had never made a quilt before, each stage of the quilt required a technique to learn, with new problems to understand and resolve.

One thing that seemed very difficult was how I was going to finish the edges. I could not see how to stop and achieve a hemmed edge.

I also had the problem the materials that I had not yet used, which  were from other places I had visited. I wanted to add them, but their colours did not match well with the central panels.

00160023Despite the fact that the completed panels now covered the bed, my “solution” to these problems was to prevaricate on how I was going to stop and make the work even larger. I would add two additional panels, on either side, which would come down to the ground. These use materials from Singapore, Bangkok, Australia, Norfolk Island, and New Zealand, celebrating visits to friends and relatives as well as stop overs during the travels.

So now, it was even bigger and harder to work with… I was problem solving piece by piece… and was hand sewing because it was too heavy to control going through the sewing machine… This was because (any quilters reading this will be head in hands now) I had already layered the patchwork, quilt wadding and back, started to join it with quilting stitches and buttons, starting from the middle of the quilt… and then decided to add the side panels…  I managed it. But this is the wrong order – I made my life difficult.

But it looks lovely, so I am pleased I added the extra sections.

All the sections had been added, all the quilting was done, all the buttons added. I just needed to work out how to do the edges. I looked up how to finish the edges – I needed to make some binding strips. So I did that.  They would need to be top stitched right round the edges of the quilt. It would need to be machine sewn, to be robust enough, but with the weight of the quilt, that was going to be difficult to do well. So I was very uncertain about how to continue. Then, in preparing to pin the binding to the quilt, I tidied the edges by cutting away the surplus quilt wadding that  extended beyond the patchwork.  And, I cut into the patchwork by accident…

And that, although I was so upset at the time, was a good thing. Because that made me stop, and then just say “Well – I just ruined it, so if I make a mistake top stitching the edges, it doesn’t matter so much. It will still be a quilt.”

I patched the patchwork, I sewed on the binding… It was done. .

It is done, and in use! And even though I can see the flaws in it, no-one else minds them. Either they can’t see them, or perhaps they don’t matter, or for some people they are evidence that this is a hand made item, a folk-piece not an industrial item.

My quilt: Achieved! It is on the bed, cosy, beautiful, useful, and joyful.

0029

Symmetry in the quilt

0029The quilt in place on the bed January 2015

0003To aid the story telling in the quilt, as well as to please the eye, the design includes deliberate grouping of the motifs to give sections that are almost but not perfectly symmetrical.  Rather than aim for perfect symmetry and not quite achieve it, which can look jarring, I took advice to slightly offset from symmetry and precise aligning, so that the viewer’s eye is led on a journey.

quilt symmetry drawingThe quilt almost has reflectional symmetry along its longest axis from pillow to foot of the quilt. There is a line of symmetry going through it which divides it into two pieces which are mirror images of each other. Within that, the two strips either side of the centre strip are arranged with rotational symmetry with regard to each other. I also moved pairs of squares within the strips so that a motif moves across the quilt while retaining its shape and orientation. In addition, I choose in places to break the symmetry and have sequences of patches instead. The mix of symmetry and asymmetry reflects the story of the quilt as I have made repeated journeys to some places and only single journeys to other places over the years I have been making the quilt.

You can find more on symmetry in: http://en.wikipedia.org/wiki/Symmetry#Scale_symmetry_and_fractals

Will you believe the beauty I’ve known?

Walking in the forest I hear the tui and bellbirds call:0014

Around me in the damp warmth dragonflies swarm

And mosses grow.

Walking by the mountain river I see the water leap:0008

Around me in the cool air lichen grows

And fishes weave.

Walking on the beach I taste the salt wind:0007

Around me in the hot light the wild gulls call

And waves tumble.

Walking through the gardens I smell the spicy trees:0016

Around me in the park friends walk and talk

And flowers bloom.

Walking by the quilt I touch the journeys I have made:0029

Around me in the quiet room memories swirl

And happiness flows.


Love the quilt, fear the quilt

This is the story of a quilt; a patchwork quilt that is still not quite finished, which has been many years in the making.

On 30th December 2014, I wrote a note to myself “Today I could be finishing the quilt, but the prospect is too alarming – at this point I could make an unrecoverable mistake, and 10 years effort would be destroyed.

Or is that too dramatic? It is a patchwork quilt, so any gross errors could be patched…

Maybe the fear is a fear of finishing, or of finishing but making small mistakes that detract from the whole work. Maybe it is a fear of what other people will say about the quilt, and maybe it is a fear of what project I will undertake next.

Later that day when I was working on the quilt, I did make an error of judgement and technique, which felt unrecoverable.

When trimming some excess of the wadding at one edge, I managed to get some extra material caught into the wadding and so cut a slice through the patchwork. After initial anger and despair at how stupid I had been, I realised that all I could do now was repair-patch it. Having made that mistake and repaired it, I decided to just go for it. I laid out the quilt, tacked it, and finally I sewed the edges. At last – a usable quilt!

In fact, if I had not made that mistake, I probably would not have been able to finish the edges. I still would not have a usable quilt.

Lately it has been cold, the quilt is on the bed, and in use. It is warm, cosy, and lovely to look at. It has flaws, but it works. A friend said to me today, “Are you really done with it? Or will you still fiddle with it?”  Honestly? I think once the weather warms up, I will be working on hand sewing some more areas of detailed quilting; we will see!

0029

The quilt on the bed

The story of the quilt has many strands. It has been an adventure in time and space, taking place in the physical world and in my imagination. When I made that mistake I thought “I love the quilt, and I fear that my technique is not good enough to finish it well.” But I did get it to a usable state. Now I have some posts planned about how I designed and made the quilt, and the story it tells.